Quick craft: miniature vases
This post was first published on themonstercrafts.blogspot.com. If you see it anywhere else, just know it's been plagiarized without my consent. Please, don't support shady companies that do this.
Hello again dolly-friends! Long time, no see. I've been busier than I anticipated with school, and I've barely had much time left for my hobbies. I thought during the first weeks I would have more spare time, but was quite busy running errands to get books and school supplies, so no. And then I started with exams and papers, so it's been hard to find some spare time. But finally, here we are.
I actually started writing this post over a month ago, but until now I haven't had the time to finish it. Because of this, I don't remember as many details of how I made it as I usually would, so I'm afraid this tutorial is going to be all over the place. Please, bear with me.
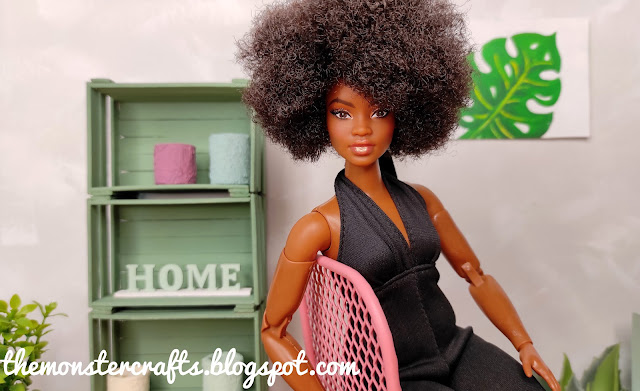
If you read my new crate bookshelf post, you probably saw two vases that I made to add some extra decor to the shelves. It was something very quick that I did while I was working on the bookcase. While I didn't think it was the nicest decor, I found it was a quick and easy way to add a pop of color to my dioramas. I decided I wanted to make a few more and, while I'm at it, take a few photos for a quick tutorial on the blog.
The idea for this craft came from seeing these "imperfect" vases and other decor items that seem to be all the rage nowadays. I kept seeing these texture concrete walls with built-in concrete shelves filled with vases, weave baskets and other materials that have some "natural" feel. Add to that the suggestion Phyllis and Xanadu made a while back of making a textured wall using white glue and toiled paper and, voila, I have an idea for a craft project.
In case you don't spend as much time as I do on Pinterest, here are a few examples of the type of decor I'm talking about. Mind you, I found these examples AFTER I had finished this project, so I didn't use them as a guide.
For this craft you will need:
- A cookie or cereal box.
- Scissors.
- White glue (a cheap one).
- Toilet paper (just a few squares).
- Craft paint and brushes.
- Water
Although the craft itself doesn't take a long time to make, it's a bit messy and has quite long drying time. I would recommend protecting well the surface you're going to be working on. But let's start with the craft
I start by drawing a straight line on my cereal box, and then another line at 2 cm (0,79 inches). I have made all of these vases between 2 and 2,5 cm (0,99 inches) tall, but you can make them any size you want. I did make one 1,5 cm, but I didn't love how it looked. Cut it out using scissors.
Using a marker to help you, roll the stripe and glue it in place using white glue. I don't have great photos of the process, but you need to apply white glue all along the stripe and roll it over.
Hold it for a minute or so to help it dry in place. I did have some trouble with a couple of them, because the end kept ungluing. I had to go back and re-glue them using a better white glue this time.
Once they have completely dried, it's time to get messy. On a small cup or bowl, mix 50% white glue and 50% water. Dip your oldest and messiest brush into the mix and start sticking the toilet paper (previously shredded).
The first time I did this, it took over 24 hours to fully dry because I kept adding layers of glue over wet glue. So, this time I decided to do a thinner coat, let it dry, and then apply a second coat. Also, I ended up working on 5 of these at the same time, which allowed me to let them air dry for a bit while working on something else.
Now it's time for my favorite part: painting. I know this type of decor is usually made in neutral colors and earthy tones, but I like colorful things. I did want to use at least one neutral color (Dove Gray), but the rest I wanted other colors. It's been a while, so I don't remember exactly my reasoning behind picking each color, but I remember picking a Burnt Orange to have some fall decor.
 |
| Painting using Frosted Plum |
Here's the final result. From left to right, the colors I used are: Blue Mist, Dove Gray, Burnt Orange, Sea Glass, Frosted Plum, Terra Coral and Light Buttermilk (all from Americana Acrylics).
Now it's time to see how it looks on a scene. I didn't have much time to take these, so I apologize for both the mediocre quality and the quantity.
It's not something groundbreaking or super intricate, but I think they look fine. They do accomplish the purpose of both filling my shelves and adding a pop of color if needed. If you want to, you can also use this technique to make pots and vases for your miniature plants. Or experiment with the shape, which is something I would love to do at some point in the future.
I hope you guys enjoyed, because it's taken me forever to finish the post, which I actually started right before I went back to school. Indeed, I did film some footage for a YouTube video that I was planning to publish at the same time as this post, but that has just been impossible. I will still try to finish editing it at some point in the future, but I highly doubt I will have time for that before the Christmas break.
(Edit April 2023: The video is finally on my YouTube channel. Check it out here! )School is taking more of my time than I anticipated, so I'm not sure how often will I be able to publish here before the Christmas break. When I don't have an exam, I have to work on some other project or do some summaries so I don't have to do them later on. What I'm doing it's not very hard, it's slightly above high school level, but it's more targeted towards doing a specific job (not sure about the equivalent in other countries). But there are lots of lecture hours, and we do have to study and do homework afterwards. Luckily, I got my English classes validated with my First Certificate/B2* diploma, so I have now 6 spare hours every week.
I hope you're all doing well. I haven't been keeping up with my reading list, so I'll drop by your blogs as soon as I can.
Monster Crafts
*B2 is 4th out of 6 levels of the Common European Framework of Reference for Languages (CERF), which is an European standard to determine your level of a language.


I'm glad that you're doing well, even if you're busy. I think your pictures turned out fine; they are framed well and not too dark. I bought a new ring light, so hopefully I can get some pictures taken within the next day or so.
ReplyDeleteThanks Barb! When I looked back at the photos, I didn't like the composition. There were some that I couldn't use because the craft wasn't very visible. Glad to hear you got a new ring light. Hope this one won't give you trouble!
DeleteHi MC! Thanks for sharing these vases. The tissue then painted plates could be used to texturize cheap plastic doll plates to look metallic. All the photos look good to me.
ReplyDeleteYears ago, I had a room I had painted that looked like a cross between Misty Blue and Dove Grey. My favorite vase color though is Burnt Orange. So vividly popping among the other colors.
Thanks D7ana! That's a great idea about the plates. At some point, I would like to make different shapes with the cereal box, like a bowl, and cover it with tissue paper, to see how it looks.
DeleteYour room sounds beautiful, I love dusty blues. I must say that Blue Mist doesn't show true to color on that photo and it looks nicer in real life.
Thanks for stopping by!
These vases look great and such an easy way to make them, even if it can be messy in some parts. They really look like real pots.
ReplyDeleteThanks Niina. I think you could also apply this technique to other decor elements, or make them a different shape.
Delete