Coral wainscot for spring diorama
Spring arrived a few weeks ago, and a new season calls for a new colorful background. If you've been following my blog for a while, you might be familiar with my Mix and Match series, in which I make interchangeable elements to use as backgrounds for your doll photos. Recently I made dark gray wainscot to combine with some of my colorful walls, but today I want to make a colorful version of that, so I use it for spring and summer looking photos.
Since I already explained how to make a wainscot quite in depth in my original New wainscot design post, I'm not going to go into so much detail on this post. However, I did change some measurements and proportions, which I will explain, so you can choose the proportions that work best for you.
Also, I want to point out that recently I got a new working table, so things might look a bit different than usual.
The supplies you will need are the same as last time, which are:
- Binding cardboard/gray cardboard.
- A sharp cutter (with a new blade).
- A glue stick and white glue.
- Primer. I personally like to use gesso.
- Craft paint and brushes.
- A cereal box.
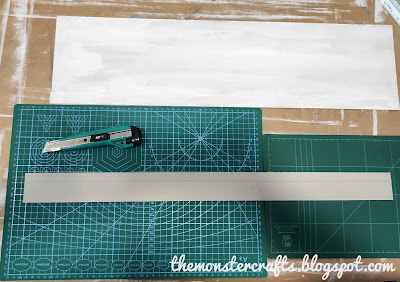
Usually I would start by cutting down all the pieces, but I had two of them already cut and primed from when I made the last wainscot. This time our main piece is going to be 17cm tall (6,69 inches) instead of 16 cm (6,3 in). We also have a 2cm (0,79 in) piece that I'm going to use as a bottom trim.
So now I just need to make a piece to be the top trim. I made it 1,6 cm (6,30 in), since I think that size will look more proportionate to the bottom trim. I cut it out as usual.
Prime your piece using gesso on both sides and let it dry. This is what we should have.
Glue the pieces in place using white glue. I normally use any white glue that you can find at a hardware store, I've gotten better results than with the ones you get at stationery stores. Also, I wanted to make a little past to test the color but, as you can see, I got too carried away.
On a cereal box, draw a few stripes to make our vertical slats. I made mine 1,3 cm (5,12 in). Cut them out.
Before gluing anything in place, I like to plan out the placement and spacing of the slats. I decided to leave a 12 cm spacing (4,72 in) between them. This gives me an idea of how it will look like. I should have probably cleared my working space better before taking any photos.
Measure the gap between the top and bottom trim and cut your pieces to fit in between. I would recommend measuring the exact place where you're going to glue them, just in case there's a slight difference from one part to the other.
You can glue two or more pieces together to get more dimension. I've chosen to glue just two.
Once all the slats are ready, it's time to glue them in place. Take your time for this part. I glued the first one 5cm (1,97 in) from the edge, and then left a 12 cm space between the rest of them.
Once everything is glued down, it's time to paint. I've chosen the color Coral blush, from Americana Acrylics. This is the same color I used for my crate console that I made a while back.
For comparison, I've taken this pic with both the gray and coral wainscot, so you can appreciate the difference between the two.
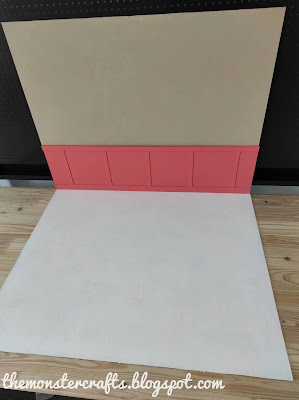
Now it's time to set up a scene to take some doll photos. As I mentioned earlier, I have a new working table that has this black panel. This is actually a working bench and that panel is meant to hang tools, but I just got it so I won't destroy my wall by sticking props for doll photography.
First I will place the floor piece, and then stick the wall piece using poster putty. Then stick the wainscot to the wall using poster putty.
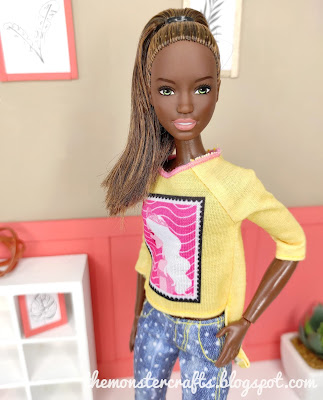
Now let's check out how this wainscot looks on camera, which is its main purpose. I'm going to combine it with my Burlap wall, which is the only "neutral" wall I have so far. Here's a pic with Kim.
It comes across more reddish on camera that how it looks in real life, but I'm not mad at it.
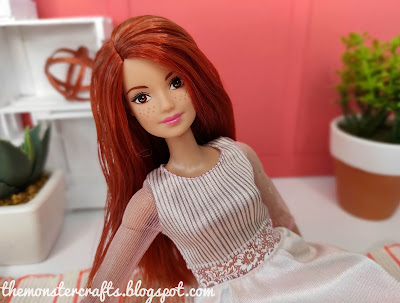
I also wanted to try how it would look with a something more colorful. I chose to go with my Sea Glass wall, which is quite a muted color and I thought it could work.
On camera it looks quite gray, but it's actually a soft green with a grayish undertone. I'm not sure how I feel about this color combo.
Overall I'm quite happy with this wainscot. It's quite a fun and cute color, but maybe not for your everyday scene. I do feel like I need a lot more props, since my scenes still feel quite "empty", but I'm getting closer with each project. I do work at what seems to be a very slow pace, and lately I haven't been very motivated. I have a full list of projects and ideas, but I'm quite unsure on how to prioritize them.
I'm not quite sure what I will do for my next post. I'm trying to combine different types of posts, so people don't get bored, but I have no idea of what I will do next. I have another opinionated post started, but I don't know if I'd rather finish that one or try to write another post from scratch.
On a personal note, we're doing fine. I'm trying to keep my psoriasis in check with pomades and natural remedies, and every day I need to make sure I expose my patches to direct sunlight for 10 minutes. I've also been having terrible neck pain, but I've visited my physiotherapist, and she's given me some exercises I can do daily, so it won't get sore again. But, aside from that, we're doing well and staying healthy.
Let me know what would you like to see next, as well as what do you think of this project. I hope you are all doing well, and I'll see you on my next post.
Monster Crafts
My cooking blog:










Nice job on the new wainscot. I love the vibrancy of the color.
ReplyDeleteThank you Phyllis. Hope you're doing well, we miss you over here.
DeleteMore props aren't a bad idea to have, to switch things up, but I don't feel like your scenes are empty. I like the coral color.
ReplyDeleteSorry that you have psoriasis. Mr. BTEG has it too; he is on an autoimmune suppressant, as he also has Crohn's and Hashimoto's and other stuff. Do you suffer from psoriatic arthritis?
Thanks, I'm glad that you like the color, it's very happy. I feel like I could make a few smaller objects, like books or a plant to fit inside my shelves, they are quite empty, but I try to place things ina way that it's not too obvious that they're empty. Textured walls and floors could help make it look fuller.
DeleteI don't think I have psoriatic arthritis since I don't feel any suspicious joint pain, but is something I want to discuss with my doctor next time I see her. Sorry that Mr. BTEG has those conditions. I'm not very familiar with them, except that Crohn's affects your digestive system. I just hope they're not "incompatible" between them, like when the medication for one is going to aggravate the other.
Thanks for stopping by.
Psoriasis, Crohn's and Hashimoto's are all autoimmune disorders, along with many others. Crohn's means the immune system attacks the intestines; Hashimoto's means you have hypothyroidism, but your immune system is actively attacking your thyroid tissues. Poor guy has a bunch of health problems; I'm glad that you don't suffer from arthritis.
DeleteI would be interested to see your technique if you texture some walls and floors.
I was more familiar with Crohn's because a girl in my high school had it. She also had a bunch of other conditions. Having one health condition is already a bummer, but when they start to pile up it can be really hard.
DeleteI've been wanting to try it for quite some time, but I'm not very motivated to cut the binding cardboard, which is my least favourite part.
Love, love, love the combination of the coral with the beige MC! That black wall on your new bench/table could also be a great backdrop for when you want to create something spooky, like for Halloween.
ReplyDeleteOh isn't psoriasis the pits? I have it too, but fortunately mine's only mild and quite under control. I do find it's worse when I get stressed, so I try to stay calm by meditating, it seems to help.
Big hugs,
X
Thanks Xanadu, I'm glad you like it. The only issue with the table is that there's a huge gap between the wall and the table top,so I will have to figure out how to cover that. But I do like the texture of the back with the holes.
DeleteIt is! Mine is mostly located on my feet and elbows, and it's more or less under control. Yes, stress seems to be a common trigger. I started having it right before I moved home, when I was so stressed about it.
Big hugs to you too.
Thanks Linda. Good that you like the green one, I'm not sure how I feel about it. I feel like I could benefit of having more props, so my scenes could look more alive, but not so many that it looks distracting.
ReplyDeleteI've always been a very stressed out person, but this past year I've been trying to work on it. Stress really aggravates any health condition. Exercice does help to keep the stress in check.
You too, have a lovely week.
Love this! The sea glass/coral is my favourite combo. I saw pics of the wainscot on your instagram, it's great to see the behind the scenes. I couldn't believe it was made with card! :D
ReplyDeleteHopefully your psoriasis is in check right now and you are feeling well.
Have a great weekend.
Thank you! The reason why I make this kind of posts is because, when I was starting, I often saw amazing dioramas or pics and couldn't find any hints on how to make something similar. I also do like that combo, it's colorful but not too overpowering.
DeleteI still have lots of psoriasis patches, but at least they're not expanding. Usually during summer it gets better.
You too, have a great weekend!
Well, it is Spring over here too, but a cold one. The weather cast even said there could be snow. In May. Even if I really do not like the hot summer days, it would be lovely with some warmer weather. Or at least sunshine.
ReplyDeleteThis wainscot tutorial is great! Love the bright colors too.
Hope that the pomades and natural remedies help you! Has the exercises helped you with he neck pain, I hope so!
Hi Niina! Snow in May sounds crazy to me! We did have a colder and very rainy April, but as soon as May arrived, it's super hot outside. I also don't like very hot weather, and I wish the temperature in July and August was the one we have right now.
DeleteThe pomades are helping me, but there's still some patches here and there. The exercices have helped me a bit, but I think it's time for me to buy a new and better bed pillow. Thanks, I'm glad that you like the wainscot. I also like the bright colors!