Getting started with the sewing machine
This post was first published on themonstercrafts.blogspot.com. If you see it published somewhere else, it's because it has been plagiarized from my blog without my consent. Please, don't support pages that do this, and support the original creators instead. You can also help creators by reporting said pages if you have the chance to do so.
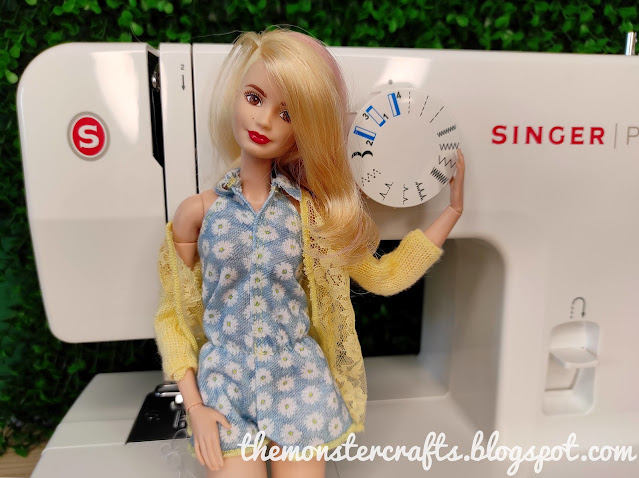
Well, this wasn't exactly the post I had planned to do next, but since I want to use my blog as a "sewing progress diary", I'm going for it. As some of you might know at this point, I've been learning how to sew. Everything I have made until now, I have hand stitched. I've gotten better at it, but it does take a lot of time to hand stitch. So, the next step for me was to learn how to use a sewing machine. And here we are.
I got this sewing machine as a gift from Mr. Monster on Christmas, and, until now, I haven't even used it. It's a pretty basic model, meant for beginners who just want to do some simple projects. So I finally decided to give it a go and start practicing with it.
I thought that I would have made more progress at this point, but turns out the machine can be a bit more complex than I thought. First, I spent an entire morning trying to figure out how to thread the whole thing, wind the bobbin, etc. The instructions don't explain things as well as they think they do, specially for someone that has never used a sewing machine. Luckily, I found some videos of people using it, so I finally figured out how to put everything in place.
Once everything was set up, I decided to do some practice stitching. I have a fitted sheet that we don't use because it feels like sandpaper (it was very cheap, clear example of "you get what you pay for"), so I thought it could be perfect to use as a test fabric. I drew some lines with a pen and tried to top stitch them. Here's the finished result.
My results are a bit hit or miss, and it surprisingly worse on the last one I did. For some reason, when I tried the zigzag stitch, it did gather the fabric. I don't know what I'm doing wrong here, maybe I should pull the fabric from the sides? Should I change the tension? This is something that I definitely need to figure out.
As part of the practice session, I decided to try to make a doll-size pillow, so I could practice stopping and turning the fabric. This time I made it slightly larger, 6cm x 6cm. As you can see, I did turn my fabric a stitch-too-soon in some places, so it has a bit of a rounder edge instead of a perfect 90º angle. But, overall, I think it turned fine for a first try.
The hardest part of making doll-size pillows, at least for me, is to close-stitch them. But I found this video on how to close-stitch pillows, and I've been using it as a guide. It's a video on human-size pillows, but I still find it useful. Since this is a test, I filled it with cotton balls, instead of pillow fluff. I also feel like this is the perfect size for doll pillows, as the other ones were a bit too small.
That's all the progress I've managed to make these past few days. I've been working on the pattern for the sofa cover, and it's almost ready to do a test run. However, I'm quite unsure if I should just give it a go and try to sew it with the sewing machine (using this blue fabric), or if instead, I should keep practicing with easier stuff. I do want to get better with the sewing machine, as it's so much faster than hand-stitching.
I haven't been working on any craft projects. The eczema hasn't healed completely, so I want to wait until it's better. Next week I'm going to the dermatologist to see what's going on, and see if there's a more effective treatment. It's a bummer, because I'm really in the mood for crafting, but my hands say otherwise. Maybe it's the universe telling me that I need to practice some sewing and make some clothes for my curvy dolls.
Hope you're all doing well, and I'll see you in July
Monster Crafts
PS. Despite my efforts to avoid this, my content is still being plagiarized by some sketchy page. I will put a disclaimer on top of all my posts calling them out until they stop copying my content. Thanks April (Fashion Doll Stylist) for the idea!


Whatever the numbers on your machine are, for general sewing it is usually best to choose the number in the middle for needle tension. Bobbin tension is something that should generally be left alone, unless one is a professional.
ReplyDeleteI'm not sure why the fabric kept bunching up when you made the zig-zag stitches. Does your machine have a separate foot for zig-zag? Maybe you could make a video of zig-zag sewing, unless someone comes up with a helpful answer before then.
Different needles should be used with different types of fabrics. Just out of curiousity, do you know what this sheet fabric was made of? I've noticed I need longer stitches when sewing with cotton. What type of thread are you using?
Hi Barb! I've been using 4 for most of the practices, which is the recommended number. The instructions also did mention not to touch the bobbin tension, which was something I didn't know could be changed.
DeleteIt does come with other feet/pressers, but they're for zippers and stuff like that, not specific for zig-zag. The comment down below mentions using a stabilizer, which I could try. I also hope this won't be a problem if I use a zig-zag stitch on the very edge of the fabric.
The sheet is made 50% cotton and 50% polyester. Not sure about the type of thread, because I got it in a set that came with some basic colors way before I got the sewing machine, when I was planning to hand-stitch my clothes. Turns out there's a lot that goes into learning how to properly sew using a sewing machine.
Hope the person stealing your posts gets caught. So frustrating!
ReplyDeleteIf you are sewing on just one layer of fabric, especially thin fabric, zig-zag and other decorative stitches will bunch. Usually a stabilizer is needed under the fabric. There are many types of stabilizer available in craft/fabric stores but you can also use tissue paper like you find in gift bags/boxes or the thin tissue-like paper commercial sewing patterns are printed on.
Sorry you are still suffering from the eczema. Hope the dermatologist can find a remedy that works for you.
Teresa F.
Hi Teresa! It is so frustrating, but I'm not the only one that this has been happening too.
DeleteOh, that's a great advice on the zig-zag stitch. I have some sort of tissue paper around, so I will try that. I will also look for tutorials online, to see if there's something else I'm doing wrong.
I also hope the dermatologist can help!
Thanks for stopping by!
Guess who is catching up on some blog posts? :D
DeleteI am amazed who people make time to copy other peoples post and then post them on some other place without telling where they found it. If someone wants to post something they like, why not share the link and ask if they can do that. Great with a disclaimer on the top of every post!
The sewing machines can be rather complex. I have been there myself. I had a simple one that I bought from IKEA and it can do some odd stuff. The ones my mother-in-law had I haven’t even looked at because I think it will be too hard. Testing on different fabrics and with different ways to sew is a very good way to start. Your pillow looks really nice and your doll looks happy with it.
Hope that your eczema heals soon! Take care!
Hi Niina! I think the platform that is copying my posts is some sort of "content farm" that basically copy and paste several bloggers' content that is somewhat doll or toy related. They probably use a bot to do so, and hopefully they won't "see" my disclaimer, but their readers will.
DeleteYeah, there's a lot more that goes into using it than I originally thought. My grandma had one of those that was a full on furniture piece, and I don't think I would be able to operate that.
Thanks for keeping up with all of my posts. The eczema is doing better now that I have a new prescription pomade.
Hi Linda! I don't know where I got the idea from, honestly. The instructions said most fabrics will need a tension between 3-5, so that's what I've been trying. I think I read somewhere specific tensions for different types of fabric, but I don't seem to find it anymore.
ReplyDeleteI also hope the dermatologist can give me a good remedy this time and my hands can go back to normal.
You too, have a nice weekend. Hugs!
Hi MC. That's a really good start! You're probably not going to use the zigzag stitch very much, so just concentrate on getting a good steady straight stitch. When you get ready to work with some sort of pattern, determine how far away the the seam allowance from your stitching line. Place the needle on the stitching line, and where the edge of the fabric falls against the machine, mark with a piece of tape directly on the machine. That will help guide you as you sew. For your pillows, sew in a straight line then stop with the needle down, and turn your fabric 90 degrees and continue. When you are finished. Be sure to cut the corners off diagonally and don't forget to press the seams open. Turn right side out and press the seams once again. I'll be anxious to see your journey which I am sure will be a lot of fun and quite successful.Big hugs.
ReplyDeleteThanks April. I will try to focus on regular stitching first, as I can always use an anti-fray solution for the edges. The tape trick is such a great idea. I was turning the fabric with the needle up, concerned that I might break the needle if it was down. I was already cutting the edges diagonally, but not pressing the seams. Thanks so much for your useful advice and tips. I will try to do my best.
DeleteBig hugs to you too!