How to: making Mix and Match backgrounds for doll photography
If you were following my blog last year, you might know that part of my content was focused on backgrounds for doll photography. They can really help highlight a doll and compliment her and make the photo look a bit more polished, specially if, like me, you don't have great photography skills or good equipment. On this post that I wrote last year, I made my own colorful backgrounds using cereal boxes and craft paint. The problem was that they were too small and I could just take photos of the doll from their waist up. After I wrote that post, I started thinking what could I use to make bigger backgrounds, but that wasn't hard to find or too expensive. Finally, around late August- early September, I came up with this idea and wanted to give it a try so badly. Unfortunately, life and moving houses got in the middle and didn't manage to do so until now.


Here's a pic of how I set everything up. I stick the big board to the wall and the accent piece using poster putty.


The main idea is to have something that's not too complicated to do, doesn't take much storage space and allows you to change up a bit your scenario with a few elements. I found out that in craft stores they sell this gray cardboard (or mount board) that's quite inexpensive and easy to paint. I'm not sure how it's exactly called, but is what they use to make covers for scrapbook albums. I used it in the past to make a stencil and, despite it's a bit hard to cut, I thought it could work out.

The original idea was to make a few flat backgrounds and accent elements in different colors and combine them, inspired by some magazine/editorial type of photos (you can see some examples here). Then the idea branched out and I thought it would be great to make patterned backgrounds or more realistic looking backgrounds. Recently, I found out that a fellow collector named Bonequea does something a bit similar with her backgrounds and, even though my original idea wasn't inspired by her, I just want to put that out. Also, check out her Instagram, her photos are fantastic. Because this was an experiment and I didn't really know it this would work out, on today's post I will only focus on flat, simple backgrounds.
Full disclaimer: this blog is targeted towards adult collectors. In case that you're a child that has come across this post, I would suggest you ask an adult to help you with this project. Let's start.
For this project, you will need:
- Gray cardboard/mount board.
- Cutter, if possible with a brand new blade.
- Cutting board.
- Craft paint/acrylic paint.
- Primer (gesso works fine).
- Brushes.
I started by deciding how big I wanted my pieces. The cardboard sheets are quite big, 105 x 75 cm (41.3 x 29.5 inches), which allows me to make a big background. I decided to make my pieces 65x50 cm (25.6x19.7 in). I wasn't planning on making them that big, but as I was measuring I realized that way it would be easier to take group photos if I wanted to or even pretend it's a room. To make the most out of my sheet, I planned it out like this:

One of the pieces is going to be the wall, and the other is going to be the floor. The two remaining bits from the bottom are going to be accent pieces for the wall.
First step is cutting the pieces. This part is a bit tricky, because the material is hard and the sheet is so big that it's not easy to work with it. My cutting mat is so small that I had to cut it in sections. I found out that what worked out best for me is to make a quick, straight superficial cut, and then keep making the cut deeper following the line. For those of you wondering why I'm not using something like an X-acto knife, last time I worked with this material I had a hard time using it, and I ended up breaking the blade.

It was a bit tricky at first, but once the first pieces were cut, it was much easier to keep working.
Once everything is cut down, it's time to prime the pieces. I'm going to use gesso as a primer, since I know it's easy to paint afterwards. The lady from the craft store mentioned that white glue could also work as a primer, but since I have never tried it myself, I can't tell you for sure.

This part took me a bit longer than expected, since the smell is a bit strong and I had to work with the windows opened. Since it was so hot those days, I tried to work on the craft in the early hours of the morning or late in the afternoon, so I could bear to work without the AA. A thing that I noticed while priming is that the board would comb a bit while drying down. I put some weight on top and the piece went back to normal. Once both sides have been painted, there's no combing or deformation on the board.

According to the manufacturer, gesso needs 24 hours to dry down, but probably with this heat I could have painted it earlier. Let's start with the floor. Since I want it to work with as many colors as possible, I decided to make one side black, and the other side white. I used this acrylic paint called Acualux that you've probably already seen me use on this blog before. Because it comes in a little jar, it's quite easy to dip the brush into the jar and paint. However, you can use any paint you like.

From all the colors that I've used from this mat Acualux line, the white one seems to be the hardest to work with. After 1 coat of a cheaper acrylic and 2 coats of Acualux, it still looks a bit patchy. Plus, it has a bit of a yellow undertone compared with the other white products I've used. I'm not mad at it, as I hope it won't bounce the light as much when I take photos.

For the wall piece I painted one side with the same black that I used for the floor. I wanted to have an all black background, and I feel like dark colors on card stock paper always tend to have a white cast on top of it.

For the other side I used this Americana acrylic in the shade True Blue. I've used it in the past and looks great against most of my dolls (see here or here). I do feel like the Acualux one spreads better, goes further and is overall better quality than the Americana one. However, Americana has a very wide shade range, while the Acualux one is quite underwhelming. After 3 coats, I can still see a bit of patchiness, but later on in the future I might give it another coat.

Now let's move to the accent pieces. For the first one I gave it a not very even coat of the black acrylic paint. Since I'm going to use other products on top, I don't think it will matter.
For one of the sides, I went with this Dazzling Metallics in the shade Black Pearl, by Decoart (same brand that manufactures the Americana acrylics). The problem with black metallic is that apparently metallic jet black can't be done, and any black metallic is going to actually going to be a dark gray/gunmetal type of color.

For the other side, I went with this Glamour Dust glitter paint in the shade Black ice. I couldn't find this product in my area, so I bought it last year when I went on vacation to Madrid. I bought four shades and I still haven't given them a try. It's not what I was expecting, as I thought it would be more glitter packed and some specs of glitter would be black. I had to give it 3 coats to achieve what I wanted.


For the second piece, I went with this Acualux paint in the shade Fucsia (fuchsia). This is the satin formula, which is not as good as their mat finish, but it will work anyway. I painted both sides in the same color.

On one of the sides, I decided to do a little experiment and top it with the Glamour Dust in the shade Ice Crystal. This is supposed to be a glitter varnish that you can use on top of any color. The glitter specks are multi colored with the idea of matching as many colors as possible. I've just given it one coat and it looks quite uneven, but I just wanted to give it a try.


Now it's time to see if my little experiment really works. Let's start with the all black background. I recently read that taking pics against an all black background is very hard, so maybe this hasn't been such a good idea. Let's start with Toralei against the all black background.

And a similar pic adding the black metallic stripe. It just adds a pop of something different in the background. Sorry for the poor quality, I didn't notice they weren't great until I started editing.

Let's try now the glitter side. Even though it isn't what I expected, it looks good on camera.

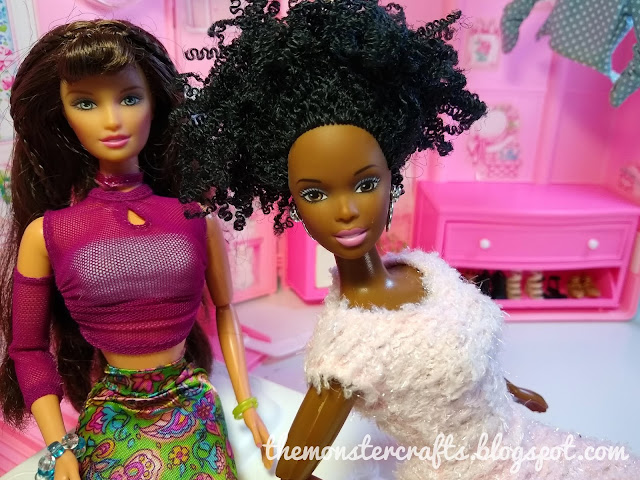
Now let's switch the glitter stripe with the pink one. The background is still missing something for me, but I think it really matches Victoria's outfit.


Now is time for the blue background. Kim and BMR 1959 (who I think is going to be called Shea) are posing against the blue wall with white floor.

The pink stripe ads a fun look to the blue background. It really suits a colorful doll like Howleen.

I didn't put much effort in these photos, since I just wanted to get a quick shot to get the effect of the background. However, I will try to take more pics with the new backgrounds this summer, and try to get better shots.
Overall, I'm quite happy with the backgrounds. I made some mistakes that I will have to correct in future projects. I think that I've made them a bit too big and that I could get away with smaller pieces, which would make them easier to paint. The accent pieces are OK, but I would say they're a bit too narrow. The blue wall for sure needs another coat, and probably with a different brush, since the ones I used were quite stiff. Despite the fact that the execution could be better, I think the idea is good, it just needs to be perfected.

I hope you guys enjoyed this post, because it has taken me forever to write it. I definitely want to write part 2 trying to make more realistic or "house looking" backgrounds. I also would love to make more fun looking ones. So far I've been considering doing a gradient effect, and I'd also love to have one in a chartreuse or citrus green color.
When it comes to my next post, I'm a little bit lost and uninspired right now. I have a little jewelry box that I want to revamp to become doll furniture and a couple of craft ideas I'd love to execute during this summer. However, craft post take me the longest to write, so I think my next post will be doll photography related. A couple of you seemed very interested to see a behind the scenes post of how I take photos and I will definitely take that into consideration.
As usual, let me know what you think in the comment section, as well as if you have any questions on how I did something. Also, suggestions for upcoming backgrounds would be more than welcome. Hope you're all staying safe this summer and I'll see you on my next post.
Monster Crafts.
To see more photography backgrounds, check out the photo backgrounds tag.
Let's keep in touch:


I think they look great, a nice easy way to add some colorful interest to pics:@)
ReplyDeleteHi Lynn! I'm glad you like them. It took me a long time to do this because I did so many pieces, but if you take your time and do them one by one it's less overwhelming.
DeleteI really enjoyed seeing how you put this together. I like your step-by-step instructions. I am still trying to figure out how to take good photographs of my dolls so this is helpful.
ReplyDeleteI watch videos on how to make doll boxrooms sometimes but most of them look too advanced for me and I don't have all of the items that are required to make the room.
As for backgrounds, I am trying to find ways to make my doll look like she is at a certain location (for example in a park or at a cafe in Paris). I know it's about perspective and choosing the right photograph as a backdrop. I just can't seem to figure out how it all works. Thanks for being a resource.
Hello Dorothy! Thank you, I'm glad that you find the instructions clear, I'm always concerned if I'm explaining myself properly.
DeleteI totally understand that feeling, some tutorials aren't very begginer friendly. I've also been there, feeling that I don't have the resources or the knowledge to make something. That's why I try to keep my post as simple and begginer friendly as posible, thinking what would I have wanted to know when I started.
That's an interesting idea. Years ago I tried to use my TV as a background, to pretend that my dolls were at different locations, but it was a flop. However, I would like to give it another shot and I would share the process here, in case it can be helpful for someone.
Thanks for your lovely comment.
Your backgrounds are wonderful! I also build big backdrops out of cardboard (or tri-folds) but tend to stick with neutral hues and textures. However, yours are so vibrant they’re making me want branch out and use more color in my own photography.
ReplyDeleteI am definitely interested in seeing more doll photography tips, particularly ideas for creating backgrounds large enough for full body pics.
Hello Amanda! I've seen some of your projects on your blog and they are really nice. I also want to make a couple backgrounds in neutral colors, I think they will work out better if I wanted to create a scene. A bright color sometimes makes a photo pop out more, so I really encourage you to give it a try.
DeleteDoll photography tips seems to be a very popular topic. I will definitely have to come up with an idea o theme for a photography post.
Thanks for stopping by.
I like what you've done and I do think that these backgrounds work very well with your doll photos. I once put together a background using printed off brick paper, and then I put some posters up on the brick 'wall' and it worked really well for my tiny BJDs, I wouldn't mind doing something like that again, maybe with some graffiti. When I get around to it! I have only found that board in one place though, the local cheap Chinese shop but on only one occasion, so I'm not sure it I'll be able to get it again, but will try.
ReplyDeleteI do like the bright colours you've used though, they make your photos really pop!
xx
Hi Sharon. Thanks, I'm glad that you like them and the bright colours. That sounds really cool, I will check out your older posts to see photos of the background. I would love to try something similar myself one day.
DeleteI found it in a not very big craft store. They also have a picture framing business, so maybe you can ask at a local framing business if they sell this. I also believe it's avaliable on Amazon. The lady from the store refered to this material as "cartón encolado" in spanish, in case this is helpful.
Thanks for stopping by.
That is really helpful MC, I will make a note of this on my phone and ask around next I go out.
DeleteYour pictures with your new backgrounds turned out quite well. I'm currently working on a room type backdrop. I don't know why I like those so much, except that I usually end up telling a story, or posing the dolls with some furniture. It would be easier for me to just have some plain backgrounds, like you have.
ReplyDeleteIf I'm right, the cardboard you're using is what artists use when they frame a picture. In English, it's called a mat, and it sits under the glass, and surrounds the painting or photograph. I'm sure there are instructions online for artists on how to cut those; maybe you could get some tips on how to cut your backgrounds easier.
Hi Barb! Thanks, I'm glad you like the pics. I would love to have a room type backdrop, even if it's just the back wall and a couch. I love doll scenes, but I don't have many doll props (it's something I want to work on). For my part 2, I would love to do something that purposes as both a plain background and a scene background. We'll see how that works.
DeleteI've been checking out, and this seems quite common in book binding. I did check out the framing mat that they had on the store, but those were often colored on the outside and white on the inside. I'm pretty sure this could be used aswell for that, if you wanted to make a custom color mat. Or maybe this is what they use to put behind the painting, I'm not sure. I didn't think about checking out cutting techniques for this material, it's a great idea.
Big hugs.
Menudo trabajo has hecho con todos estos fondos. Lo que mola de hacer estos fondos es que puedes jugar con la creatividad e ir experimentando mezclando colores y texturas.
ReplyDeleteSaludos ^^
Hola Lily. La verdad es que ha sido bastante trabajo, entre unas cosas y otras me ha costado más de dos semanas. Mi espacio de trabajo no es lo bastante grande para trabajar en dos fondos a la vez, por lo que había mucho tiempo muerto esperando a que todo se secara. Experimentar con los colores y las texturas es lo que más me llama la atención de este proyecto. Tengo otra tabla de cartón para 4 fondos más, y ya tengo más ideas que espacio.
DeleteQue pases un buen fin de semana.
Hi Linda! Thank you, I'm glad you like the idea. That was the idea, to add something extra to the picture and highlight the doll. You picked more or less my favourite pics. The blue wall I new it was going to work because I had already used that color in the past and it looked nice.
ReplyDeleteI do like white background for pictures, it looks clean, but I do agree, sometimes a pop of color looks nice. I really encourage you to give this a try and it's a great chance to use what you have at home. Most of the supplies I used I already had, I just had to buy the board and a set of big brushes. Just let me know if you give this a try. I think that your pictures are good, but I also do understand that feeling of wanting to do better.
Thank you, I hope I can have it ready for early August.
They all look great MC. Simple and straight forward, just how I like backgrounds to be (most of the time) and having them as basic backgrounds it wouldn't be difficult to add one or two items of interest every now and then to change it about a bit. Well done!
ReplyDeleteBig hugs,
X
Thanks Xanadu, I'm glad you like them. That's the whole point, to keep things as simple as possible and spice it up adding small details.
DeleteHope you're enjoying your time off. Hugs to you too.
Such an easy way to make great backgrounds! Love the black one with the pink. I have some large foam boards that I have some plans for, but I have not come to that yet. I have four so the possibilities are many. Backgrounds, diorama....well, hope to start with those someday. Need to first get through my studies. :) Thanks for this diy-post! Take care and enjoy the weekend ahead!
ReplyDeleteHi Niina. It's quite easy if you take it step by step, but doing all 2 big pieces at the same time was a lot of work. You can make a background that doubles up as a diorama, or at least that's what I want to do with part 2. I totally get that now you're studies are taking most of your time. When I'm in college I can just afford to take a few quick photos and call it a day.
DeleteHope you have a wonderful weekend too.