Working on some doll furniture
Hello everyone!
One of my projects for this summer is to build a doll size cafe so I can have an scenario for my pictures and probably doll stories. I decided to start with doing a table and some chairs that could also be used in other scenarios. The table was the easiest one, so I started with that.
I got this idea from one of My Froggy Stuff videos, but I don't remember which, so probably if you go to her Youtube Channel you'll find it.
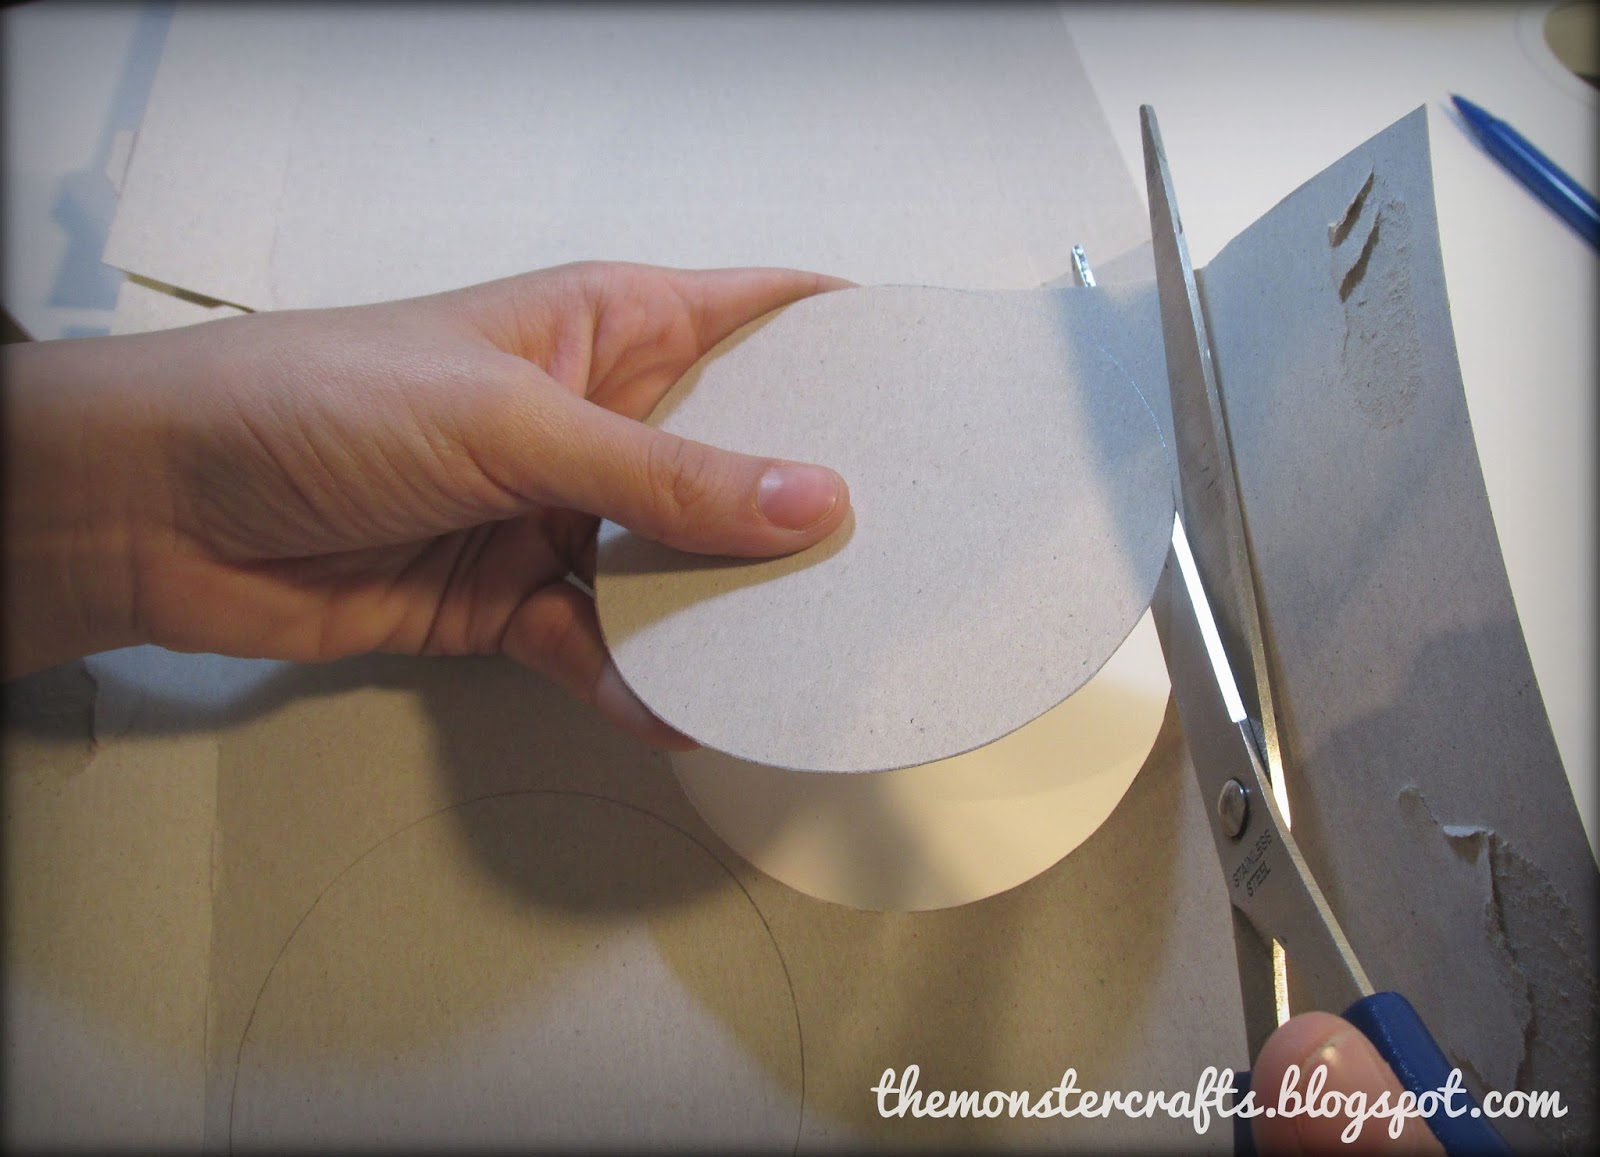
I started by drawing some circles on a box, like a cereal box. I used an enamel can to trace them, as it seemed to have a perfect size.

Cut the pieces and then glue them together. I like to put something heavy on top of the pieces while they dry.


I thought that 6 pieces would be enough, but then I felt that it was a little bit too thin and I added 2 more circles.
Once the glue was dried, I sanded the edges.

Then I repeated the same process with a smaller circle for the base. This time I used an spray paint can to trace the circles.

For the base of the table, I only used 6 pieces.
Now is time to do the tube that's going to connect the two pieces. My Froggy Stufff does a lot of crafts doing paper tubes, which is great idea if you consider that you can do the tube as thick as you want. The thing is that I do NOT like doing paper tubes, in fact, I had to do two in order to get one that looked half decent.
I would recomend that you cut the paper tube to the size you want before the glue dries completely, if not the tube will be quite hard to cut.
Then I glued the pieces using liquid silicone (or a cold hot glue variant, I don't know really how to translate that to english). I was originally planning to use white glue, but the lady in the stationery shop said it was great. I did not like it, at least for this particular project, and I think that white glue would have been a better choice because I can apply it with a brush.

I let the table dry overnight and then I painted it. I used a water base matt craft paint that is also suitable to do a chalk paint effect. I chose this one because the I thought that the matt effect would look more realistic.


And finally, here's the table:

And because I did not like the paper tube tecnique, I have started working on a chair using wooden dowels and the rest of the cardstock left from the boxes I used for the table. I'm a little bit stuck in this project, as I don't know how to really put everythign together. I just have cut the pieces from the seat and two pieces for the back.

Originally I wanted to do the chair shown on this video, but I can't find those skinny sticks anywhere, so I have to think of another way make a chair.
Do you guys have any suggestions on how to do a chair? Any ideas will be more than welcome.
Note: Most of the pictures were taken by Mr. Monster. He had a lot of patience with me, as I was costantly intererrupting him while he was watching Game of Thrones.
M.C.
One of my projects for this summer is to build a doll size cafe so I can have an scenario for my pictures and probably doll stories. I decided to start with doing a table and some chairs that could also be used in other scenarios. The table was the easiest one, so I started with that.
I got this idea from one of My Froggy Stuff videos, but I don't remember which, so probably if you go to her Youtube Channel you'll find it.
I started by drawing some circles on a box, like a cereal box. I used an enamel can to trace them, as it seemed to have a perfect size.

Cut the pieces and then glue them together. I like to put something heavy on top of the pieces while they dry.

I thought that 6 pieces would be enough, but then I felt that it was a little bit too thin and I added 2 more circles.
Once the glue was dried, I sanded the edges.

Then I repeated the same process with a smaller circle for the base. This time I used an spray paint can to trace the circles.

For the base of the table, I only used 6 pieces.
Now is time to do the tube that's going to connect the two pieces. My Froggy Stufff does a lot of crafts doing paper tubes, which is great idea if you consider that you can do the tube as thick as you want. The thing is that I do NOT like doing paper tubes, in fact, I had to do two in order to get one that looked half decent.
 |
| Sorry for the blurry photo |
Then I glued the pieces using liquid silicone (or a cold hot glue variant, I don't know really how to translate that to english). I was originally planning to use white glue, but the lady in the stationery shop said it was great. I did not like it, at least for this particular project, and I think that white glue would have been a better choice because I can apply it with a brush.

I let the table dry overnight and then I painted it. I used a water base matt craft paint that is also suitable to do a chalk paint effect. I chose this one because the I thought that the matt effect would look more realistic.


And finally, here's the table:

And because I did not like the paper tube tecnique, I have started working on a chair using wooden dowels and the rest of the cardstock left from the boxes I used for the table. I'm a little bit stuck in this project, as I don't know how to really put everythign together. I just have cut the pieces from the seat and two pieces for the back.

Originally I wanted to do the chair shown on this video, but I can't find those skinny sticks anywhere, so I have to think of another way make a chair.
Do you guys have any suggestions on how to do a chair? Any ideas will be more than welcome.
Note: Most of the pictures were taken by Mr. Monster. He had a lot of patience with me, as I was costantly intererrupting him while he was watching Game of Thrones.
M.C.


Haha, good for Mr. Monster! Games of Thrones can be pretty intense! I think the table came out great. I'm not sure what I would do for a chair...unfortunately, I am not that creative!
ReplyDeletePoor Mr. Monster, I just kept on asking him to help me with the photos. I'm glad you like the table, but for future projects, there are a couple of things that I'll do in a different way. I'm going to take a few days off crafting and then come back to this project to see if I have new ideas.
DeleteThanks for stopping by
I think you can get a variety of skinny sticks by disassembling sushi mats (bamboo mats). Alternatively, you can try cushioned chairs with cotton disks padding. The table looks great though!
ReplyDeleteOooooh, that's a great idea. I've seen some of those, there are ones with round "sticks" and others with flat ones. I considered looking on amazon, in case they sell those. I thought of the cushioned chair, but I wanted to do one without cushion aswell.
DeleteThanks for stopping by!
Yup, those things! Some have coloured sticks too. I usually see them with either flat or square sticks. You can get round bamboo sticks in barbeque and picnic supplies, they are often crooked but I use them for shoe heels.
DeleteI have round bamboo sticks already, but the ones I couldn't find were the skinny sticks. Thanks for your ideas, sure they'll come in handy.
DeleteIf you can't find skinny sticks (usually available at craft stores) try using the smaller popsicle sticks and cutting the rounded ends off. They will be a little wider than the skinny sticks, but that means you won't have to use quite as many! Good luck! Your table turned out really cute, and I think your chairs will too once you find the right material to make them.
ReplyDeleteHello Phyllis! I thought of using the popsicle sticks, the thing is that the skinny sticks (at least the ones shown in the video) are longer, and for that particular craft I feel that my popsicle sticks are a little bit short. Thank you very much for your lovely comment, I'm glad you like my table.
DeleteHave you tried looking for wooden coffee stirrers on Amazon?
ReplyDeleteYour table looks great to me and very café like.
No, I didn't thought of that! Honestly, I was having a hard time trying to translate "skinny stick" to spanish, but actually you helped me. Maybe I could also find coffee stirrers at a regular supermarket. Thanks a lot!
DeleteThis table looks great. Is it sturdy? Every time I make tables like this they easily tip over and drive me insane.
ReplyDeleteNot exactly, the circles are quite sturdy, but the tube not that much. I'm thinking of unglueing it and fill the tube with glue for extra support.
DeleteTry building the tube around a wooden stick. Or insert a stick in this tube if there is room.
DeleteI tried it, but it didn't come out very well, as the only stick I had was very thin. Now I have thicker sticks, so probably next time will be better.
Delete